Hello everybody and welcome to my first DIY blog post!!
Today I’m going to start with a pretty simple DIY. Near the beginning of the summer holiday I decided I wanted to make a tassel banner to go above my dressing table. I’d seen a lot in the background of YouTube videos and I really liked how they looked! I didn’t have any tissue paper at home so I ordered a Tassel Banner Kit from the Originals Group on Amazon, which was really handy as it contained everything I needed. I planned to make the tassel banner the second the kit arrived, but I ended up being really busy so in the end I saved it to make ready for my birthday party!
The kit contained:

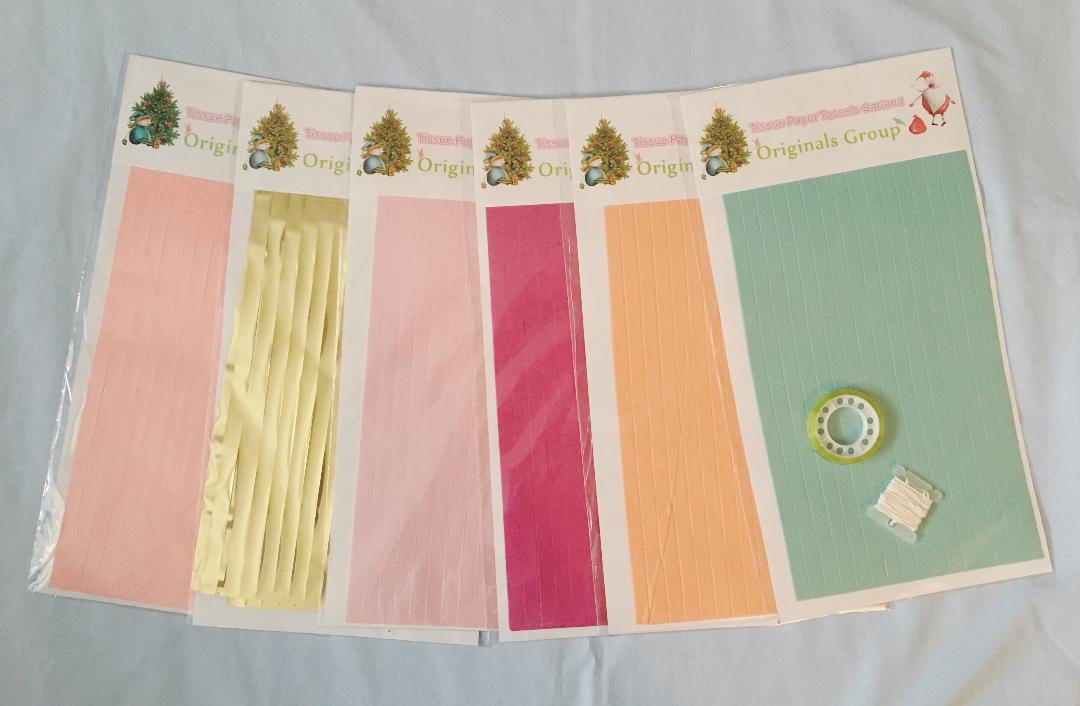
· 6 packs of tissue paper, each containing 8 sheets so you can make 4 tassels from each packet
· Some sticky tape
· A reel of string (I’d say it’s about 2 meters in length)
If you don’t have a kit you will also need
· Scissors
· A ruler
· A pencil
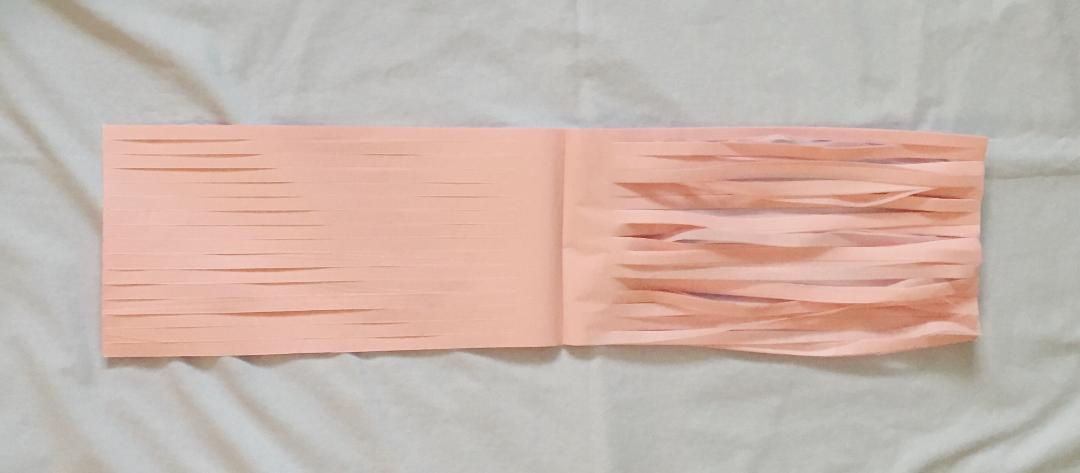
I began by removing one colour of tissue paper from the packet. If you are using your own tissue paper you will need to fold your chosen colour in half and using a ruler, pencil and scissors, cut straight lines about 1cm apart leaving an inch (2.5cm) gap at the folded edge.
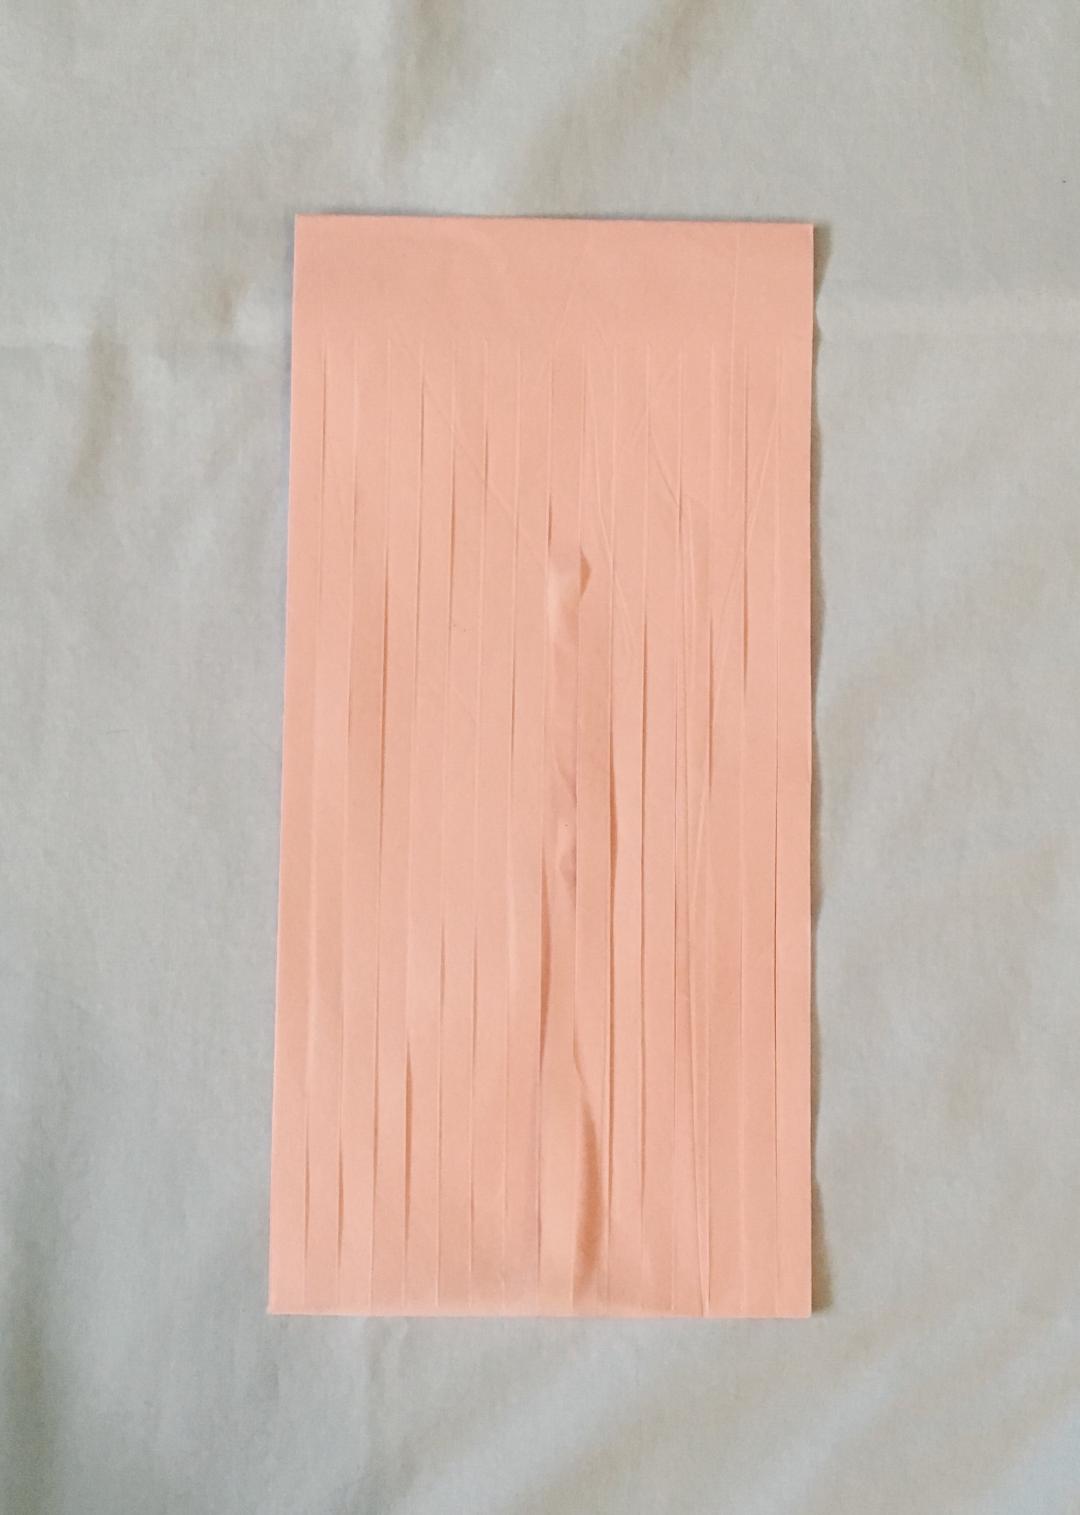
Now unfold the tissue paper and separate 2 sheets.
Then begin rolling the 2 sheets together from the middle.
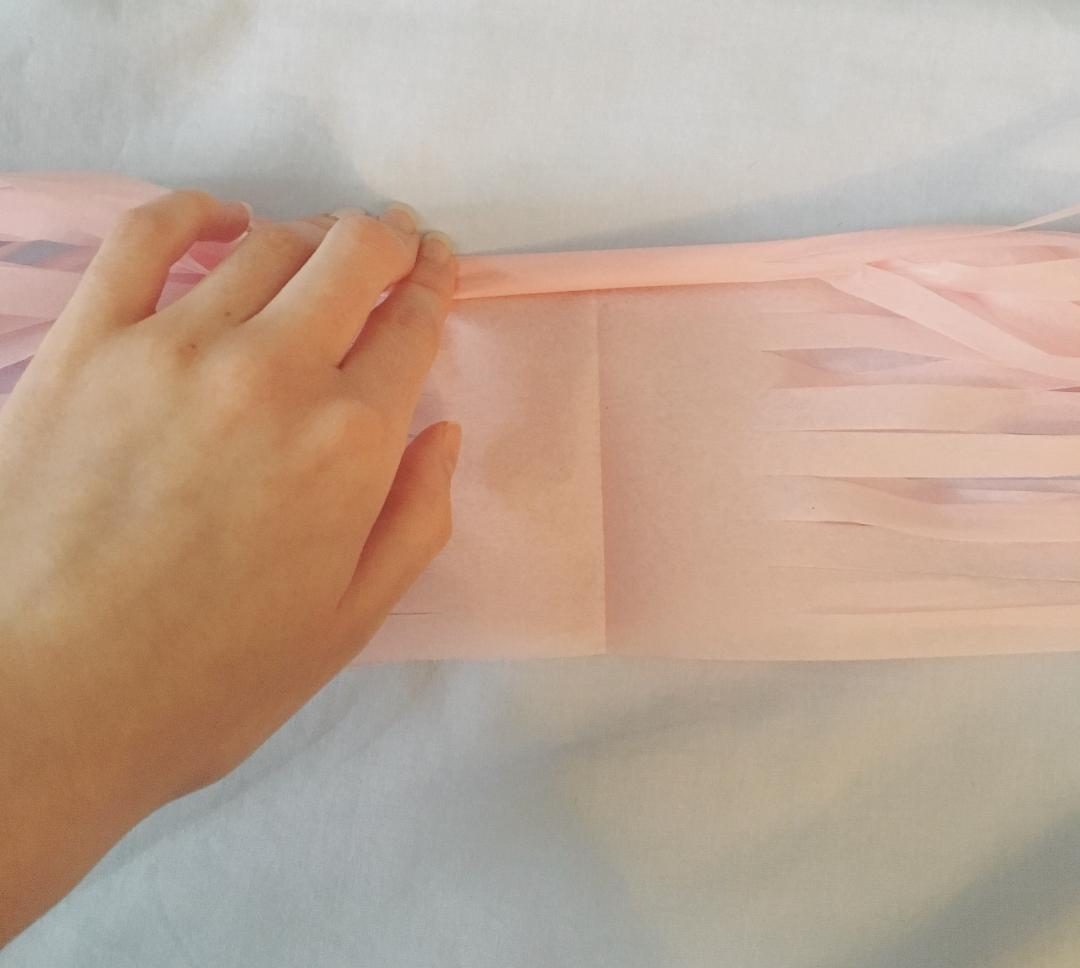
Once they’re rolled together, twist the middle tight so it looks like a piece of string or rope, this will help to give a neat and tidy finish.

Then fold over the middle and twist it together slightly to form a loop and wrap about an inch of tape at the bottom of the loop to secure the tassel.
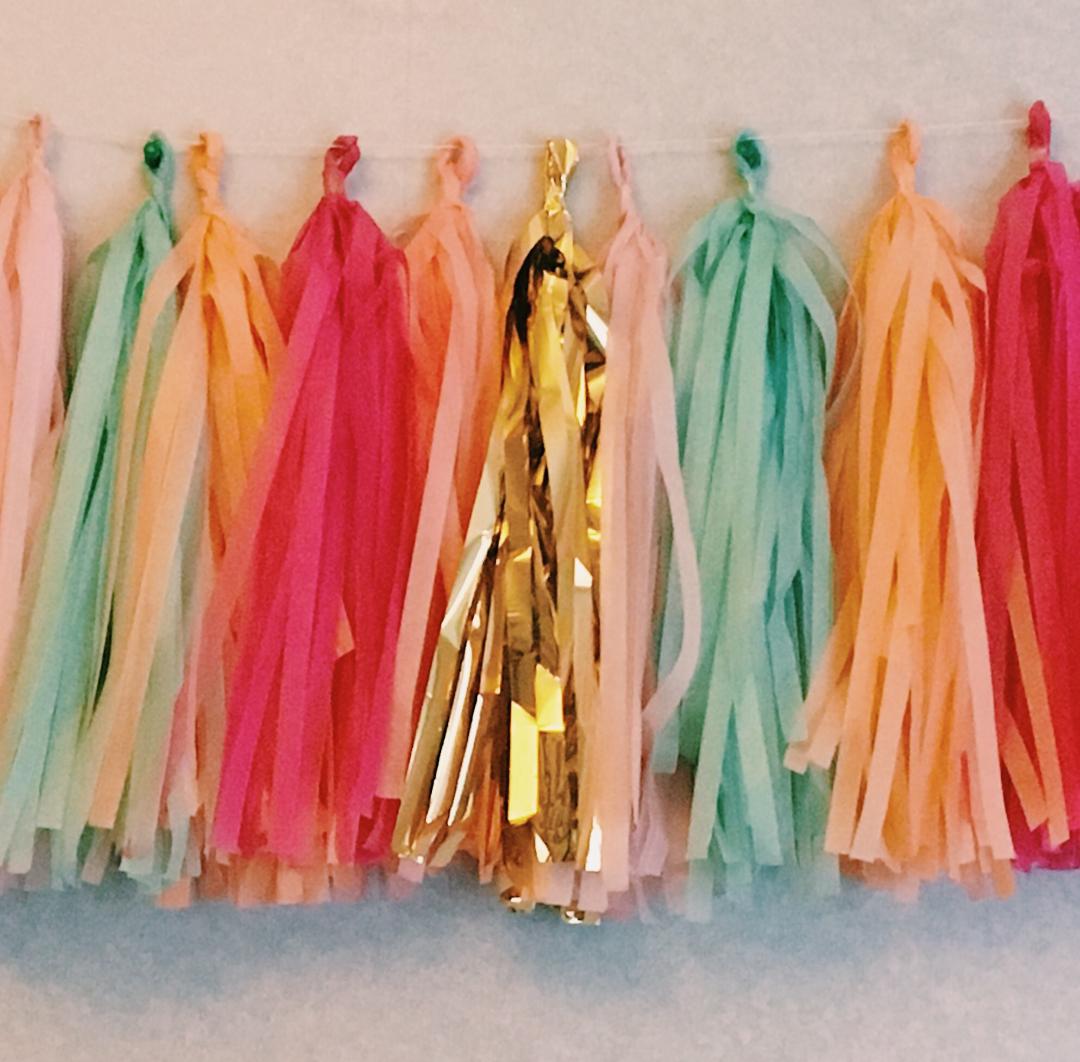
Finally, repeat however many times you like, choose the order you would like to hang them (my kit came with 2 shades of light pink so I used the gold to separate them) and thread the string through each loop. There are many ways you could hang them, in the end I used drawing pins.
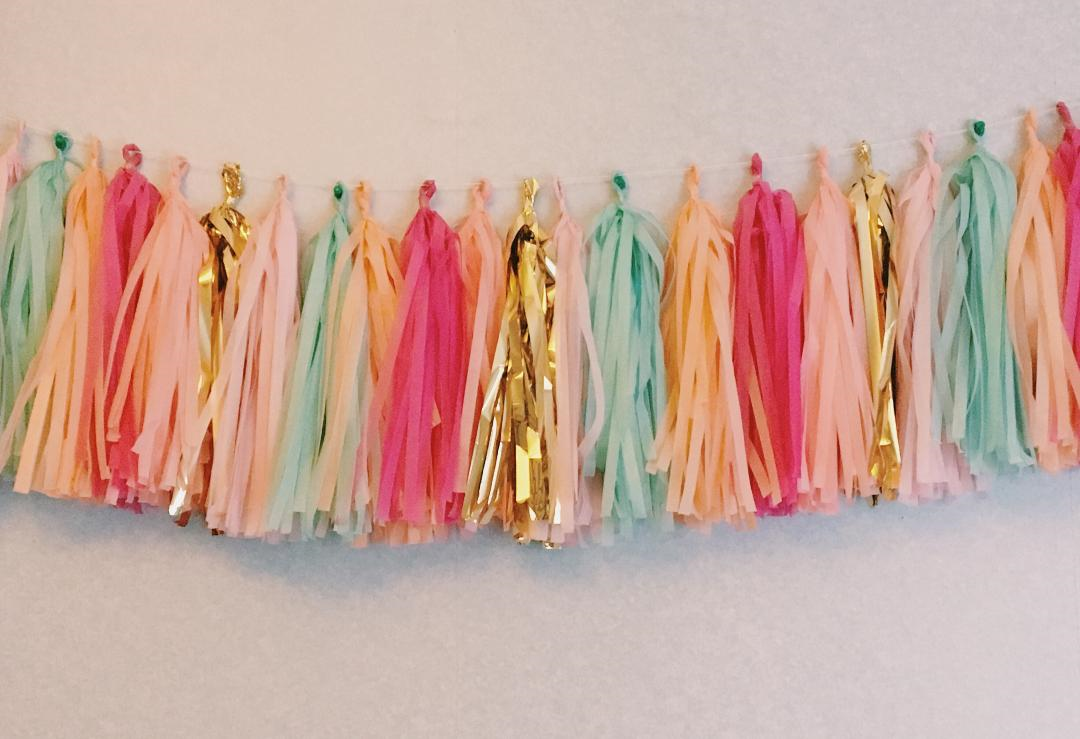
Overall I did enjoy making my tassel banner, and it’s a good DIY to do whilst catching up on YouTube or just listening to your favourite music.This craft seems a bit tricky on the first few but trust me once you’ve done about 5 it gets a lot easier. The hardiest colour to use was definitely the gold as it had a tinsel like texture which ripped very easily. My kit contained enough to make 24, which I think took me just over an hour to make. I really like how this tassel banner turned out, though I’m not very keen on the peachy orange shade, but I’m really excited to put it up in my room!
I hope you enjoyed reading my post! Would you like me to do more DIY posts? Follow me on Instagram @emily.m.adventures and @princessemily_m for daily updates, and Twitter @EmilyMAdventure for info on my next blog post.
Emily M x


Leave a comment